Qtools GIS
Part 3: Populate the Images Table
Tutorial Navigation | Prior: Part 2: Create the Images Table | Next: Part 4: Link the Images Table to Feature Class
One way to populate the Images table with data and rasters is one-by-one within an edit session in ArcMap.
- Start an edit session.
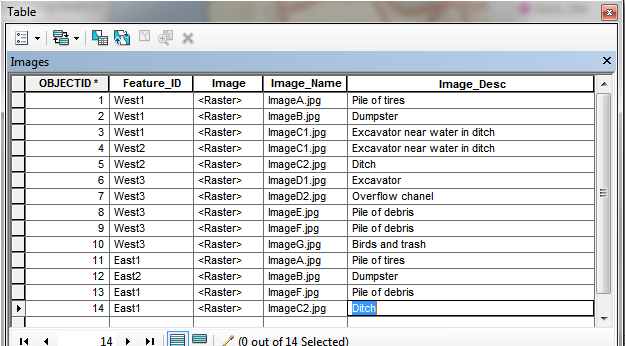
- Open the Images attribute table.
- A value must be placed in the Feature_ID field that matches a field value for the feature for which images will be linked (using a relate).
- To add the image to the field of type <Raster>, click in the cell and then click on the small button on the right edge; then right-click in the empty box and browse to the image file location.


- While adding a raster, it is easy to copy-and-paste the file name into an Image_Name field for reference, as well as entering a description.

- Any number records can be created that will link to a single feature, and they do not need to be entered in continuous order.
- Additional images can be added to the Images table and linked to new or existing features by entering the appropriate Feature_ID.
- Since the rasters are managed, they are stored in the Images table in the GDB, so the source rasters are no longer needed for the images to display properly.
- It should be possible to automate the building of the Images table using a script or Add-In. For instance, if each image had the Feature_ID either as part of the filename or in the image metadata, it would be possible to write a script to extract that information and easily build or update the Images table.
Tutorial Navigation | Prior: Part 2: Create the Images Table | Next: Part 4: Link the Images Table to Feature Class
- No comments yet.